Is SEDI Functioning?
The same eCopilot Guide shortcut (icon at right), that provides access to all of the modules employed by users to do statutory EDI documents, also has handy links to an array of information and diagnostic tools. When it opens the initial page has links to Export-It modules as seen in this capture:
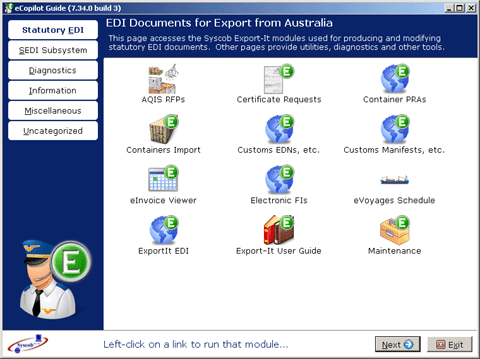
eCopilot is a wizard with multiple pages. Either press the SEDI Subsystem button at the upper left or the Next button at the lower right to go to the page with links related to Secure EDI [SEDI] Communications modules and tools:
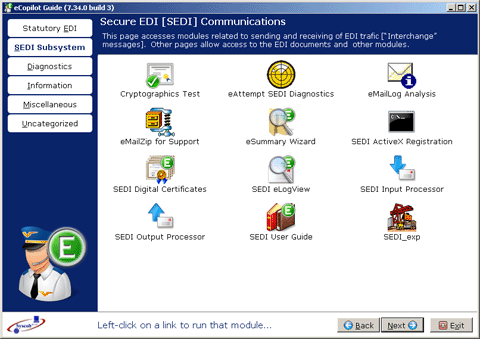
From this wizard page one can access all modules and tools related to the SEDI subsystem. A pair of utilities, the SEDI eLogView tool and eAttempt SEDI Diagnostics wizard, are keys to checking the operation of SEDI and diagnosing communications operation issues.
Evaluating SEDI Communications
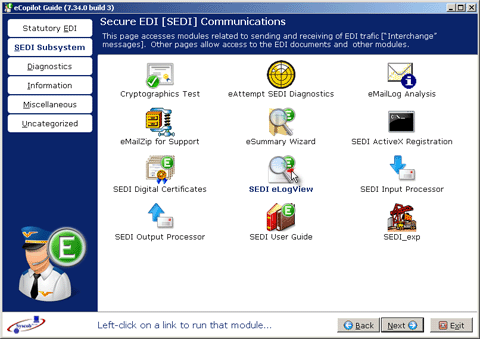
To quickly evaluate whether SEDI is performing correctly click [once] on the eLogView icon seen at the right in the eCopilot window as illustrated in this display capture:
That will cause an eLogView window, which looks like this, to open:

Press the Traffic button to load the file which records all emails sent or received by the SEDI subsystem:

The most recent email message is the last line of content. When SEDI is functioning there should be a mix of “SEND” and “RECV” messages near the bottom (“MAIL” is a non-EDI, usually SPAM, email received by SEDI). The columns identify when a message was sent or received and other information about the email messages. The EMAIL ADDRESS column has the “From” address of a “RECV” or the “To” address for a “SEND” message.
If there is not a mix of outbound and inbound traffic, or there is nothing recent in the log (the capture above illustrates how to interpret the date and time of a message), then send the logs to Syscob Support for analysis. To do that simply press the Send… button at the bottom as in this example:

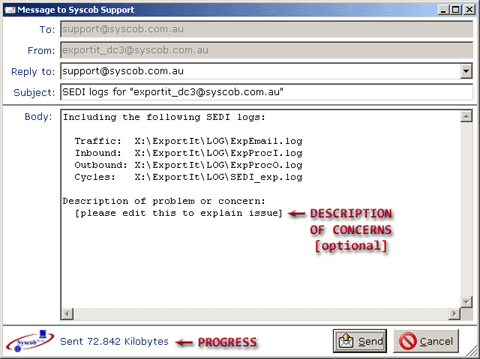
That will open a Message to Syscob Support window, with the logs attached, that is almost completely prepared, but the Reply to email address, which will receive the reply from Syscob Support, may need to be set or changed. Text that specifies the Subject of the message may also be altered or expanded.
The Body content should be altered to include a description of any problems or concerns (as this allows a more targeted analysis), but this in not mandatory. Press the Send button at the bottom of this window to start sending the logs to Syscob:

During the send operation text in the footer bar, at the right of the Syscob logo, will show the progress of sending as illustrated by this capture after 74,590 bytes had been sent to the SMTP mail server that is used for all SEDI operations:
After the message has been sent and the session to the SMTP mail server is dissolved the Message to Syscob Support window will close. Close eLogView by pressing the Exit button at bottom right then await the reply from Syscob Support “To” the message Reply to address. It will explain any actions necessary to correct problems.
Should an “EXCEPTION” or other Error dialog appear during sending it is likely to be related to SEDI issues as the same SMTP mail server is being used. In such a case it will be necessary to send an email, using an external mailer application, to Syscob Support for assistance. Before dismissing the Error dialog either capture (using [PrtSc] key) or note the text in the dialog). If the message window remains open then note the four [4] log files listed before pressing the Cancel button to close the message window.
Use any external email application (on another PC if necessary) to write a message “To” support@syscob.com.au and attach the four [4] log files named in the message Body text. In the body of the message either include the screen capture or type a description of the problem and include the error dialog text. Upon receipt Syscob Support will reply to the “From” [sender] address and any other “CC” addresses (or email addresses placed in the body of the message).
Testing SEDI Communications
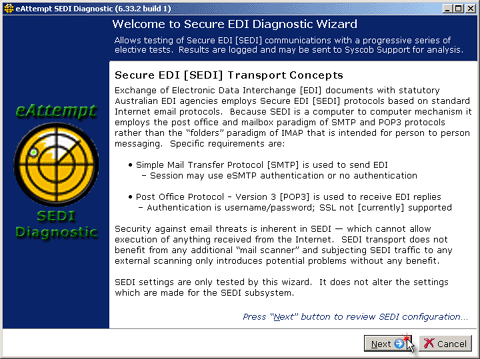
To diagnose problems with the SEDI subsystem click [once] on the eAttmpt SEDI Diagnostics icon (at right) in the eCopilot window. That will start the eAttempt SEDI Diagnostics wizard to do interactive testing of SEDI functionality. On the initial Welcome to Secure EDI Diagnostic Wizard page the concepts underlying the Secure EDI [SEDI] protocol are presented. Press the Next button at the bottom right to begin diagnosis:
The Step 1: Review SEDI Configuration page displays the settings used by SEDI. Any questionable (or missing) values will have a comment in red to the right of the dubious setting. Correcting such issues can only be done from within the SEDI_exp module via its Configuration button. When no warnings are present the settings appear valid so press the Next button to go to the next page:

The Step 2: Test TCP/IP Access to Mail Servers page has two buttons, Ping POP3 inbound server and Ping SMTP outbound server, which will attempt to “ping” the corresponding mail server. The results of these tests will appear in the lower Log Content pane on the page. A “ping” timeout may indicate a network or DNS issue preventing access to the mail server (i.e. unless a “ping” is possible the server may not be reachable). However, many mail servers operate in “stealth” mode, to hide from probing by hackers, and do not reply to a “ping” sequence—meaning timeouts are not conclusive proof of a problem. Whether the tests succeed or not, or are simply not performed, press the Next button to go to the next page:

The Step 3: Test Account Access to Mail Servers page also has a pair of buttons, Access POP3 inbound server and Access SMTP outbound server, that try to connect and login to the mail server(s) using the standard POP3 and SMTP protocols; but no mail is exchanged. The purpose is to show exactly what is exchanged between the client and the mail server (including any errors or warnings returned by the server, such as an invalid user name or password or restrictions on the mail client). In the lower pane text received from the mail server is preceded by “” while “” marks text that was sent to the server. As the next capture illustrates for SMTP each line from the mail server starts with a standard 3 digit SMTP code (400 and 500 series are errors). The POP3 protocol starts each received line with either “” or “” to indicate status. At the end of either test the workstation simply disconnects from the mail server and the last line of the lower pane will indicate whether access was successful. Here is an example (with red notes overlayed):

Note that the first column is a timestamp, in “HHMMSS.ZZZ” format with decimal precision to the millisecond, which is useful for detecting timeout situations or delays (in common with the SEDI processors log formats). After the access tests press the Next button to test the actual inbound and outbound email processors used by SEDI.
A pair of Test SEDI Input Processor and Test SEDI Output Processor buttons on the Step 4: Test Secure EDI Mail processors page invoke the actual email processors used by the SEDI subsytem (executables and respectively). Any traffic received by the input processor will be processed such that any received EDI Interchanges will be handled by Export-It on the next user “TQ” action (i.e. as production EDI inputs), but the output processor will send a “test” message, rather than actual EDI, to support@syscob.com.au to verify unencrypted sending. Each processor module will open an interactive window, as the following example for the outbound SEDI processor, and await a press of the Process button before performing its SEDI function while showing its log in the lower pane:

The first column in the log pane is also a timestamp, in “HHMMSS.ZZZ” format with decimal precision to the millisecond. In the log pane at the bottom of the processor window some error conditions are readily detected, such as:
- errors indicate that a firewall, hardware or software, is blocking network access to the mail server.
- For the input processor POP3 mail server error messages will begin with an “” prefix followed by the error text.
- For the output processor or series messages are SMTP errors. For example, code means the requested command failed because the user mailbox was unavailable (often because it was not found, or because access was refused for policy reasons).
- Connection failure for an SMTP server is typically due to an ISP constraint that prevents use of any SMTP server other that the one designated by the ISP (i.e. the ISP mail server) as an anti-SPAM measure.
However, when the “test” message is sent successfully the log pane will look like the following capture (note the overlayed pointers to the success indicators). A SEDI inbound processor test would be very similar except that it will test retreival of email from the POP3 mailbox used by SEDI and indicate success or failure in the log.

Use the Exit button to close the processor test windows after their tests complete. Back in the wizard press the Next button to go to the results summary page that specifies any corrective actions needed:
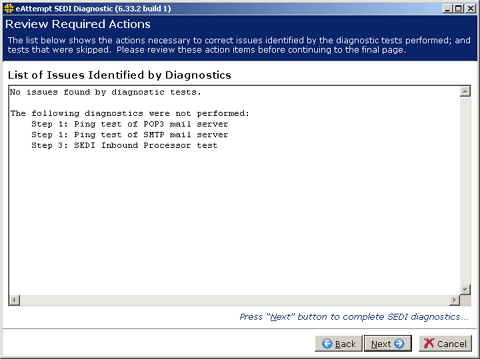
In the example above no issues were detected, but not all of the tests were performed (the Back button could be used to go back to perform any test that was unintentionally skipped). After reviewing the results of the diagnostics on this page press the Next button to go to the final page of the wizard:
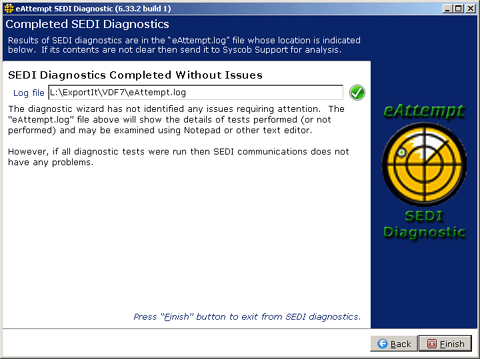
On the Completed SEDI Diagnostics page the location of the file is given in the Log file box and an icon indicating success or failure is displayed to its right. In case of problems this text file may be examined by IT staff or attached to an email message that is sent to Syscob Support (support@syscob.com.au) for analysis. After noting the log location and name press the Finish button to close the wizard (if a Confirm dialog appears, due to skipped tests, press the Yes button to exit or press No to go back into the wizard to go back to pages for any tests).